To set up the Buy with Prime widget, use the following steps:
Step 2: Add Buy with Prime to your site
The Buy with Prime widgets run alongside your existing checkout and are compatible with most ecommerce providers. To start adding Buy with Prime to your site, perform the following steps:
- On the Add Buy with Prime to your site page, select Buy with Prime widgets.
- Enter your active store URL, for example: www.example.com, and then choose Continue.
For steps to sign up for the Buy with Prime app for Shopify, go to Sign up for Buy with Prime.
Step 3: Turn on Buy with Prime for your products
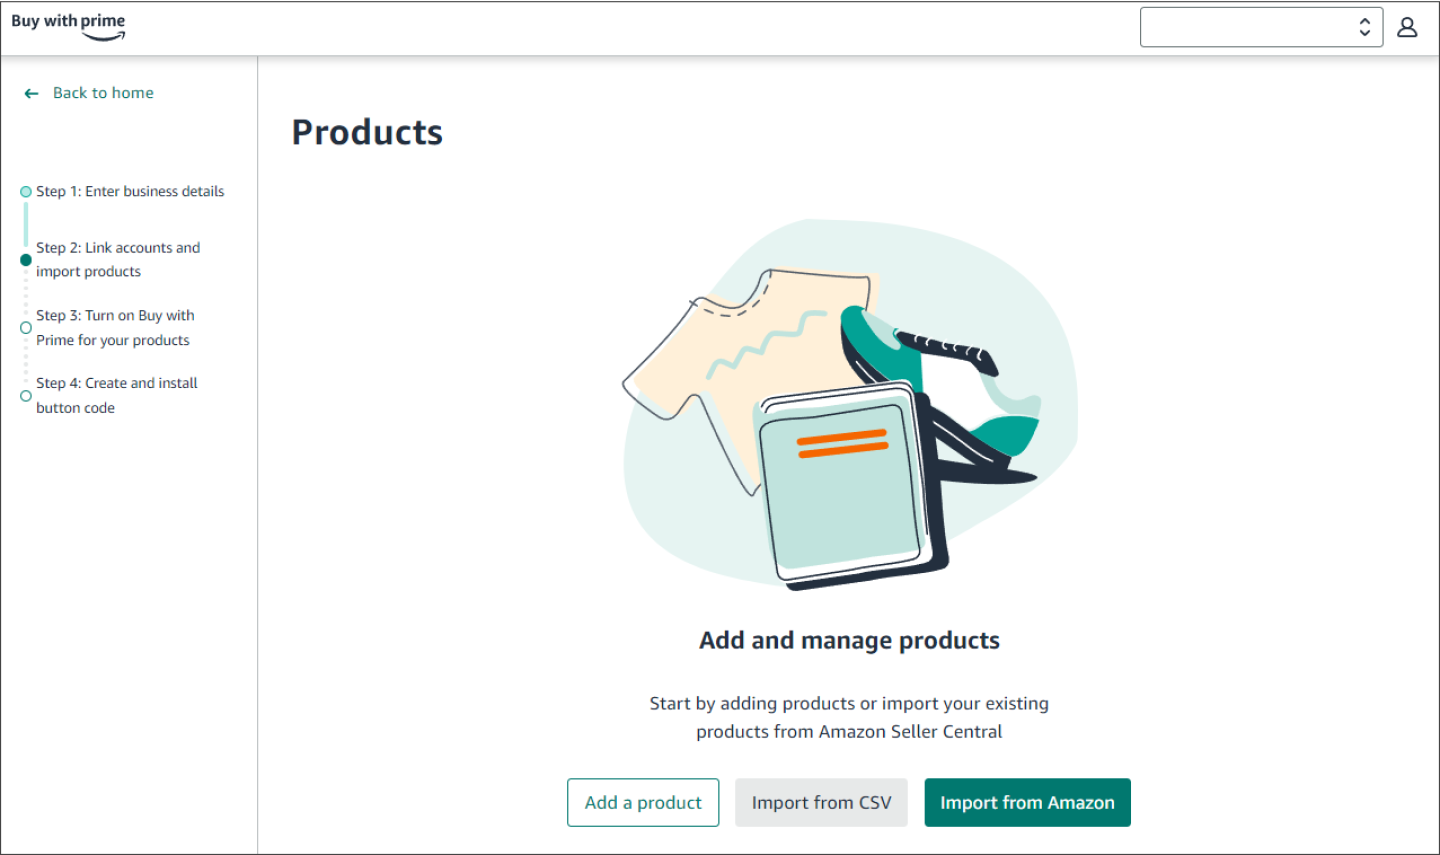
- On the merchant console, go to Step 3 Turn on Buy with Prime for your products.
- On the Add and manage products page, choose one of the options:
- Add a product
- Import from CSV
- Import from Amazon
- If you import products, find the product that you want to offer Buy with Prime. Ensure that the product is both fulfilled by Amazon and has inventory in an Amazon fulfillment center. After you’ve imported your products, you can see the amount of inventory available in the Products page on merchant console.
Note: To validate your levels of inventory, go to Check Product Inventory in Seller Central. - Confirm that your Store SKU matches your site, and that Amazon SKUs for the product match what you have on Amazon. The Seller Central SKU and your site catalog’s SKU must match or be mapped to one another. If the SKUs don’t match (or aren’t mapped), choose the Edit icon, and then enter the correct information.
- You can find your Amazon SKU in Seller Central.
- To activate the Buy with Prime button, your site SKU must match the SKU in your ecommerce catalog and your Amazon SKU must match Seller Central.
- You can find your Amazon SKU in Seller Central.
- Verify that the product price matches the price on your site. If the prices don’t match, choose the Edit icon, and then enter the correct information.
- Confirm that you meet the conditions to offer Buy with Prime.
- Turn on Offer Prime. Note: By default, shoppers who aren’t Prime members are offered the option to sign up for Prime or resume a paused Prime membership during Buy with Prime checkout. To deactivate this default option, go to the Amazon services tab, and then locate Prime membership prompt on the landing page. Choose the Actions icon […], and then choose Deactivate Prime membership prompt. Its status changes to Inactive.
Note: For more information, go to Catalog.
Step 4: Create Buy with Prime button code
Note: Before creating the code for your Buy with Prime button, ensure that you’ve completed the Buy with Prime setup and selected which products offer Buy with Prime.
- On the merchant console, go to Step 4: Create and install button code.
- On the Create Buy with Prime button page, add your site details:
- From the drop-down menu, select your ecommerce service provider.
- Enter your store name.
- Enter the URL for the privacy policy that you show on your site.
- Enter the URL for your terms & conditions that you show on your site.
- On the Your URLs field, enter your site URL with and without the “www” (such as, “example.com”), and then choose Add URL.
- If you have variations of products that are on the same product detail page, such as different colors and sizes, select the indicator to confirm that you have variations. By selecting variations, the code generator adds a line to your code to make variations available to shoppers.
- (Optional) Upload your business logo. Shoppers see your business name as part of the branded checkout and order confirmation experience. Upload a logo, or shoppers will see your business name displayed in text. For instructions on logo upload and troubleshooting go to Set up a business logo for Buy with Prime.
- (Optional) Customize the appearance of the Buy with Prime button. Choose Customize button to be directed to a new page where you can customize how your Buy with Prime button appears on your ecommerce site. For more information, go to To customize your Buy with Prime button.
- Choose Create button.
- Choose Copy, and then add the code to the product detail page template. The Buy with Prime button displays on your product pages for any product in your Buy with Prime product catalog that you’ve selected to offer Buy with Prime.
Important: To share the button code with someone else, add them as an admin in your Team Management settings so that they can access the button code internally. If you copy the button code into email, text, or other messaging tool, it can add extra characters to the code that might cause the button to not appear. If you’re giving someone temporary admin access, remember to remove them later.
Step 5: Install the Buy with Prime widget
After you create the Buy with Prime button code, you need to add it to the product detail page template on your site. The process for adding the Buy with Prime button code depends on how your site is built and the theme you use. This content is applicable to standard themes. If you’re using a custom theme, go to Troubleshoot your Buy with Prime button.
Note: When you install the Buy with Prime button code, you need to edit the theme of your ecommerce site, regardless of whether it uses a standard theme or a custom theme. If you later change or update the theme, you may inadvertently change or erase certain features of your ecommerce site theme, including your Buy with Prime button code. If this is the case, you’ll see that the Buy with Prime button has disappeared from your site. If you’re planning to change or update your theme after you’ve added the Buy with Prime button code, make sure to copy the button code (and note its location within the theme) so that you can add it back in again.
Important: Save a copy of your product detail page template and follow the general instructions. After you’ve finished installing the Buy with Prime button code, preview the Buy with Prime button for the products that you’ve set up on your site.
Step 6: Choose your ecommerce provider
The following table lists the current compatibility of the Buy with Prime button with ecommerce providers.
| Ecommerce provider | Buy with Prime button compatible | Variations compatible |
| Shopify | Yes | Yes |
| BigCommerce | Yes | Yes |
| WooCommerce | Yes | Yes |
| Magento | Yes | Yes |
| Magento 2 | Yes | Yes |
| Big Cartel | Yes | No |
| Custom Site | Yes | Yes |
| PrestaShop | Yes | No |
| Shift4Shop | Yes | Testing |
| Ultracard | Yes | Testing |
| OpenCart | Yes | Testing |
| X-Cart | Yes | Testing |
| Salesforce Commerce Platform | Yes | Testing |
| Joomla x VirtueMart | Yes | Testing |
Click the + to show the steps for installing the widget on your ESP:
Step 7: Validate Buy with Prime widget
The process you use to validate your Buy with Prime button is based on whether your products have variations. To validate that the Buy with Prime button is working correctly on your site, follow these steps:
Validate Buy with Prime on sites without variations
- Check that the Buy with Prime button appears correctly at the desired location.
- Check that the correct SKU appears at checkout after you choose Buy with Prime.
- If the Buy with Prime button isn’t working, verify that you’ve completed all the button installation steps correctly.
Note: If you’re outside the US and the Buy with Prime button doesn’t appear on your site, try using a VPN server during the installation. If you’re still having issues, go to Troubleshooting Buy with Prime widget, validate the conditions to offer Buy with Prime on your site, or contact merchant support.
Validate Buy with Prime on sites with variations
To validate that the Buy with Prime button is working correctly on your site, follow these steps:
- Check that the Buy with Prime button appears correctly when switching between variations.
- Check that the correct variation SKU appears at checkout when the Buy with Prime button is selected.
- If the Buy with Prime button isn’t working, verify that you’ve completed all the button installation steps correctly.
- If the Buy with Prime button is still not working, use the following steps to undo the variations implementation:
- Go to the merchant console.
- Turn off Offer Prime for the product variations.
- Undo the Buy with Prime button implementation.
Note: If you’re outside the US and the Buy with Prime button doesn’t appear on your site, try using VPN server during the installation. If you’re still having issues, go to Troubleshooting Buy with Prime widget, validate the conditions to offer Buy with Prime on your site, or contact merchant support.


