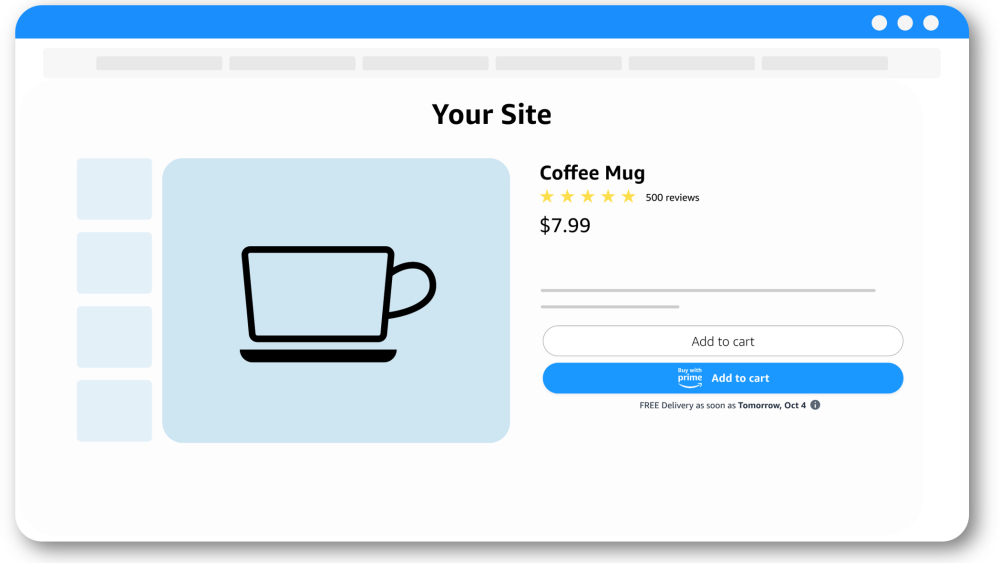
With Buy with Prime you can offer fast, free delivery to Prime members directly on your ecommerce site.
Note: The Multichannel Fulfillment app for Shopify doesn’t support Buy with Prime cart. Buy with Prime cart works only with Buy with Prime checkout.
How does Buy with Prime cart work for shoppers?
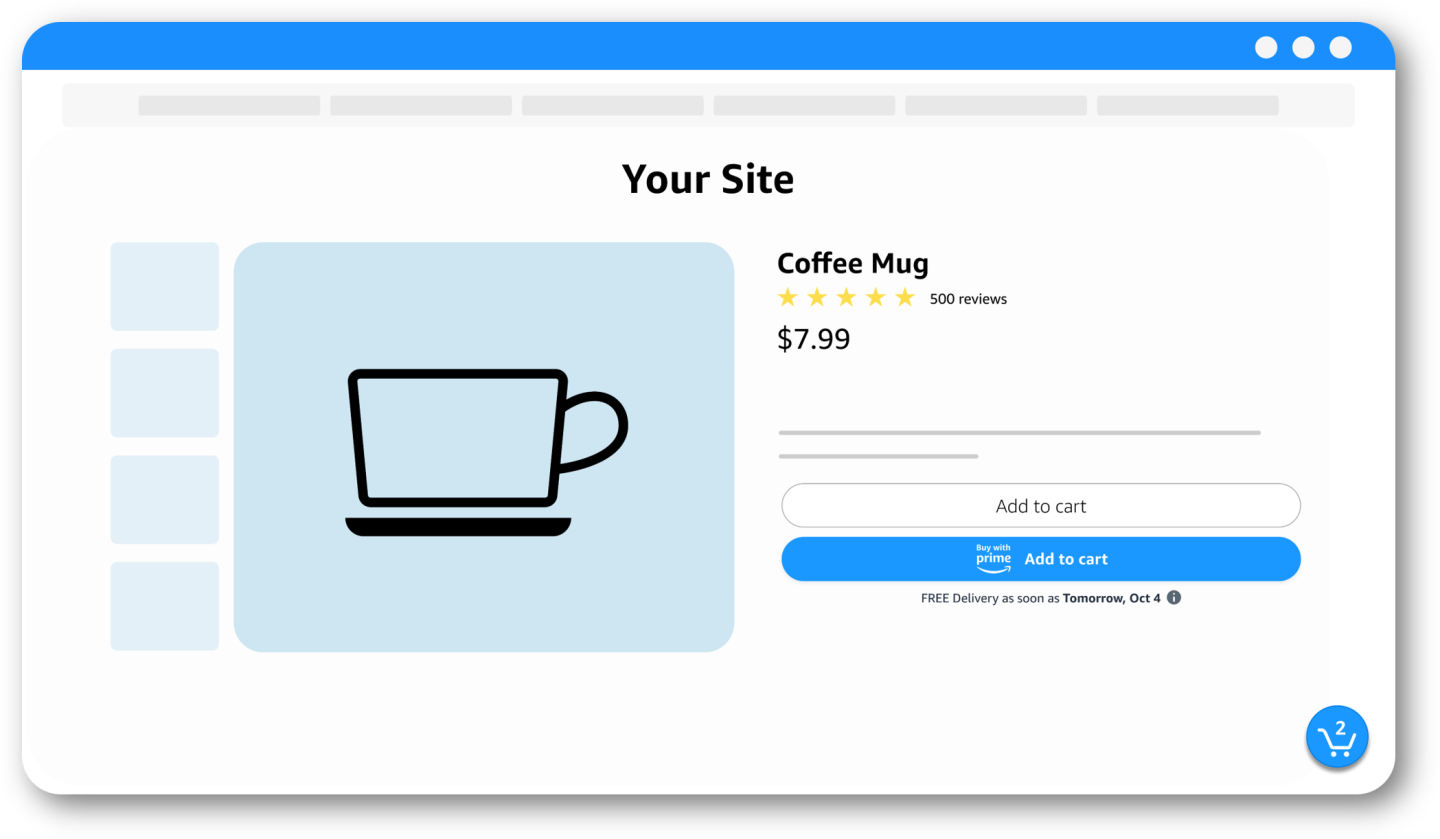
Shoppers choose the Buy with Prime button on eligible products. The product is added to their Buy with Prime cart.
Note: Buy with Prime cart works independently from your ecommerce provider’s add to cart option. Products not purchased with Buy with Prime are added to the existing ecommerce site checkout experience.
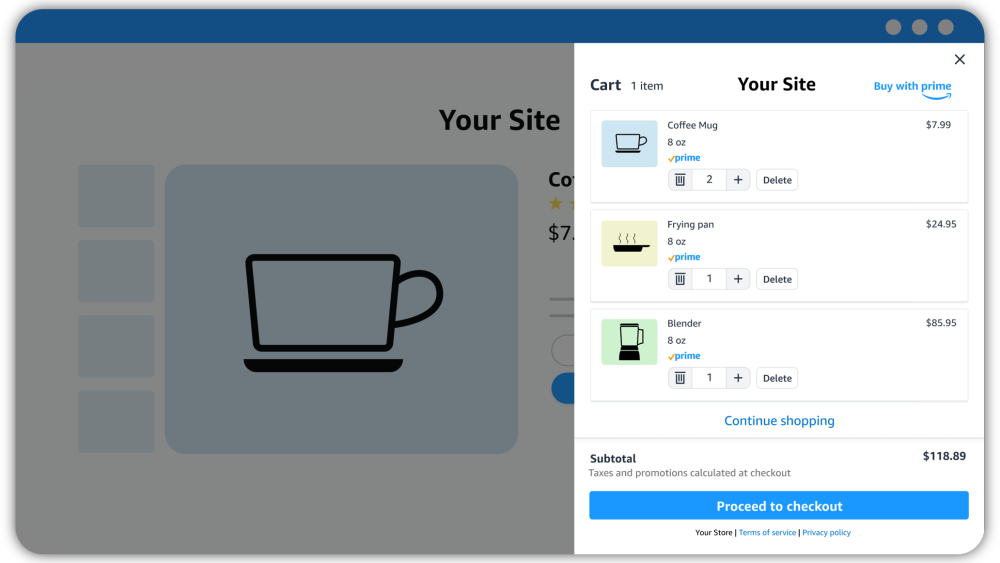
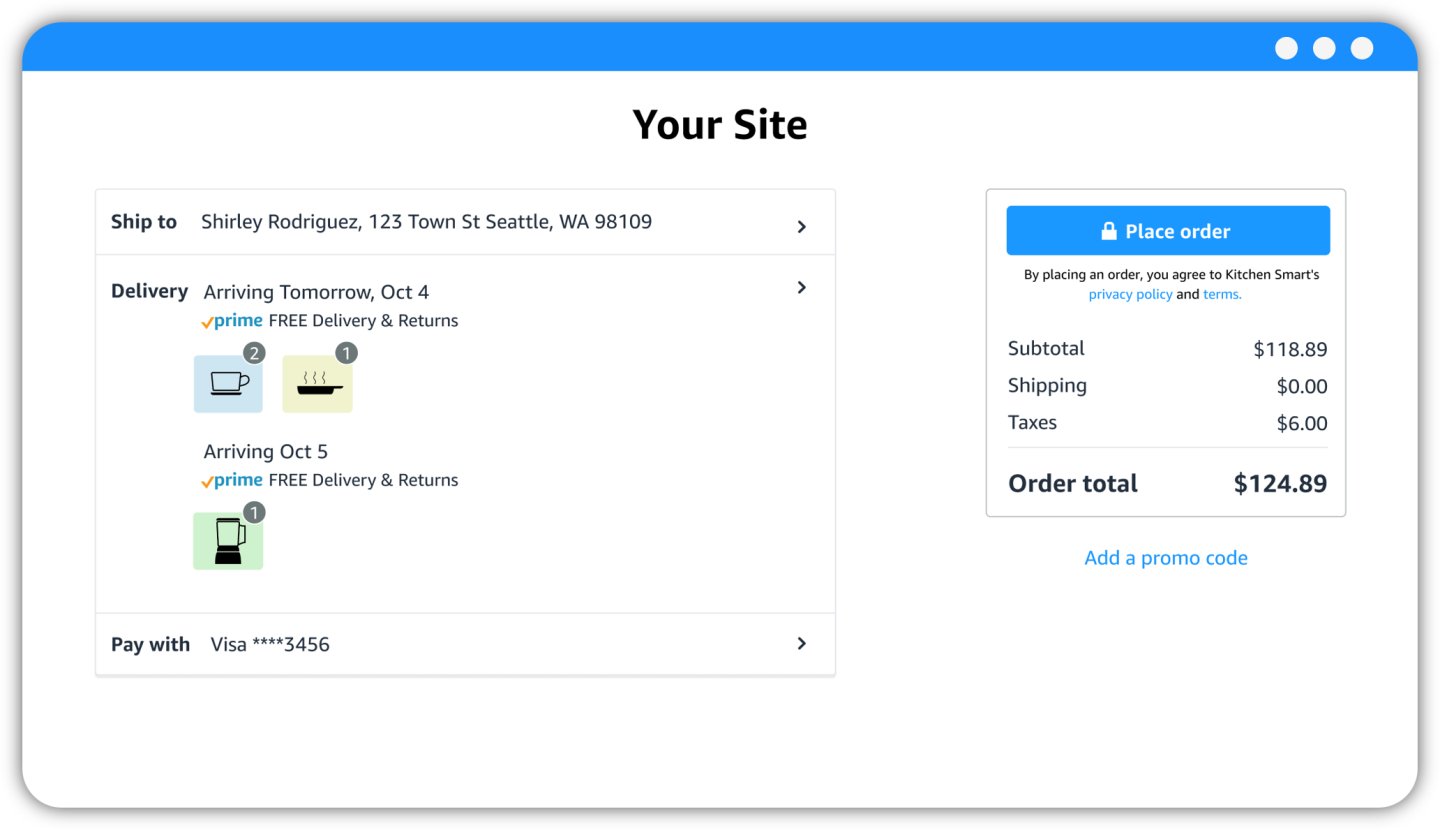
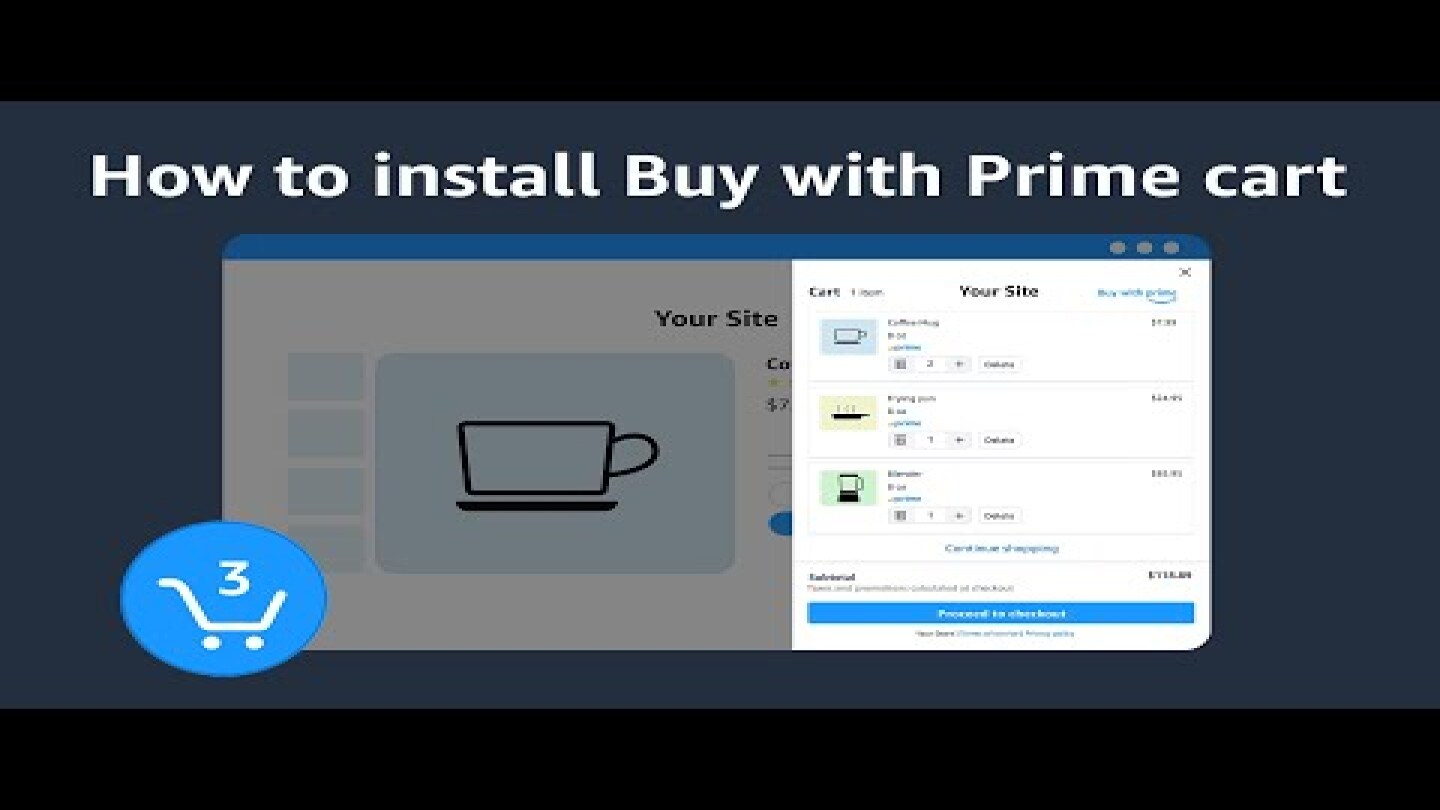
Shoppers can continue shopping, or proceed to checkout. To see their cart or check out, shoppers choose the Buy with Prime cart icon. They can edit items, and then choose Check out to purchase all of the Buy with Prime eligible products in the cart in one transaction.
To complete their order, shoppers need to sign in to their Amazon account, and then go through Buy with Prime checkout.
Note: The Buy with Prime cart supports up to 20 Buy with Prime eligible products.
Prerequisites for Buy with Prime cart
Before you start setting up Buy with Prime cart, you must have Buy with Prime checkout installed on your site.
Set up Buy with Prime cart for your site
To set up Buy with Prime cart on your site, use the following steps:
- Sign in to the merchant console.
- On the side menu, choose Settings and then Button & cart.
- On the Install cart section, turn on cart.
- In the pop-up window, choose See instructions. Or, select I’ll do it later if you want to customize the placement of the cart before installing it on your site.
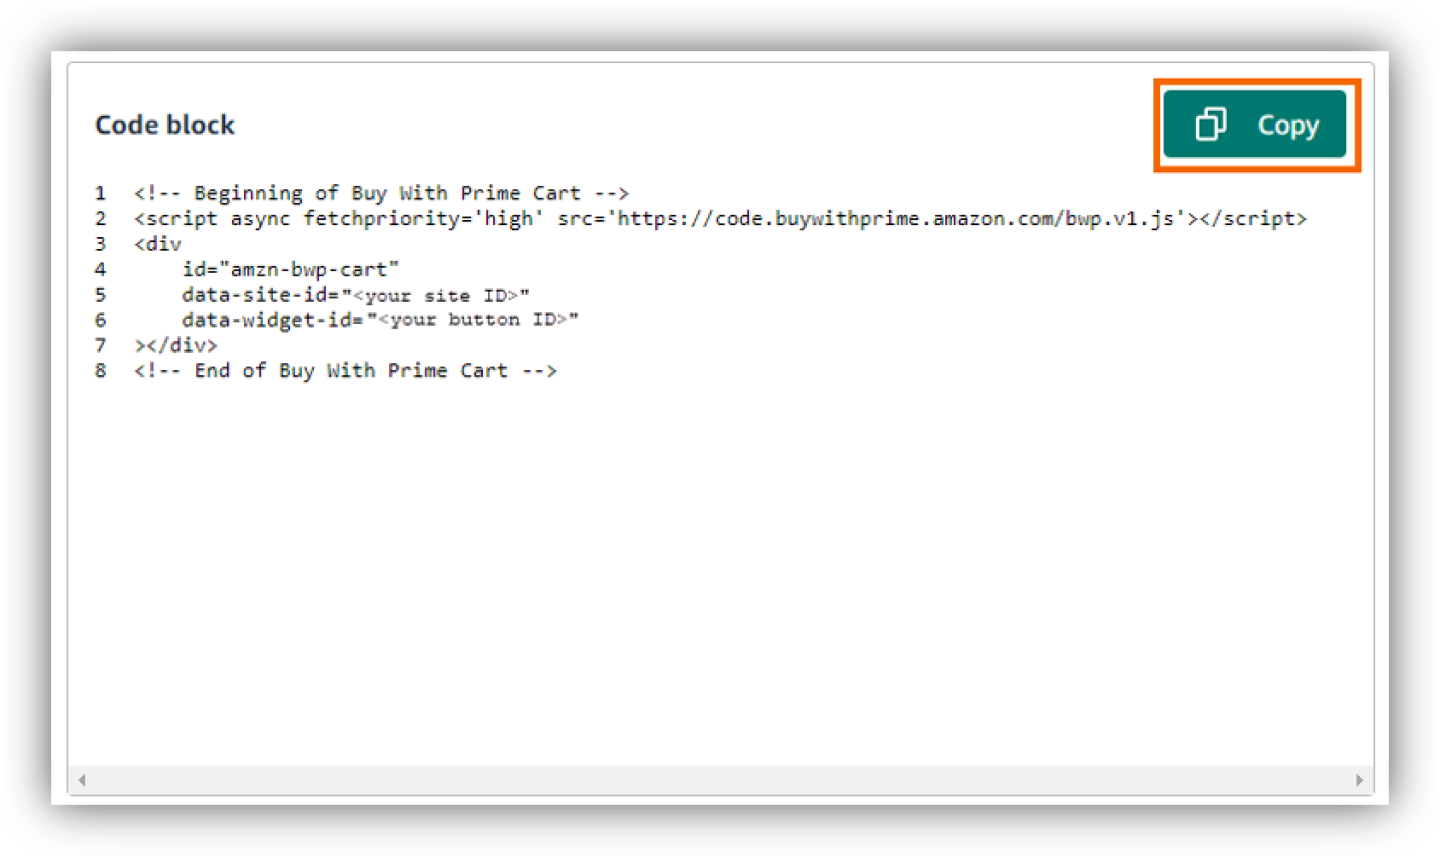
- On the Install Buy with Prime cart code page, choose Copy, and then follow the specific installation steps for your ecommerce provider listed in Install Buy with Prime cart.
Install Buy with Prime cart
After you turn on the Buy with Prime cart, you need to add the cart code to a template file that affects all the pages on your site such as a header or footer regardless of whether it uses a standard or a custom theme. The process for adding the Buy with Prime cart code varies depending on how your site is built and the theme you use. After you install the Buy with Prime cart code, preview the cart on your Buy with Prime eligible products.
To install the Buy with Prime cart on your site, follow the steps for your ecommerce service provider (ESP):
Note: Save a copy of your template file as a backup.
Add Buy with Prime cart to BigCommerce sites
To add the Buy with Prime cart to your BigCommerce site, perform the following steps:
- Sign in to your BigCommerce store.
- On the side menu, choose Storefront, and then Themes.
- To create a copy of your current theme, from the Advanced drop-down menu, select Make a copy.
- From the copied theme, choose the more actions (…) menu, and then Edit Theme Files.
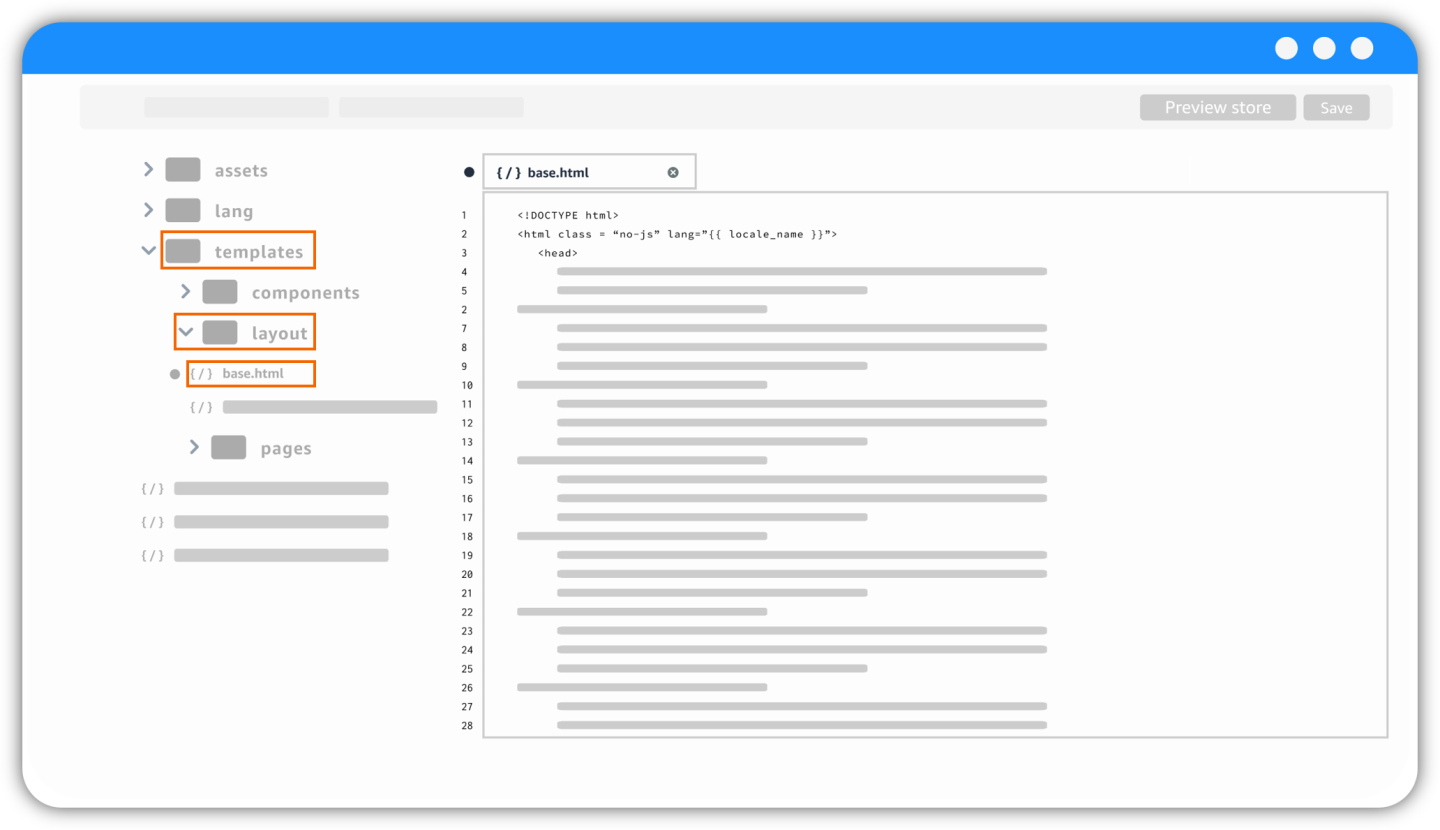
- In the file tree, locate and open the base.html template file. For example, if you’re using the default theme, choose templates, layout, and then base.html.
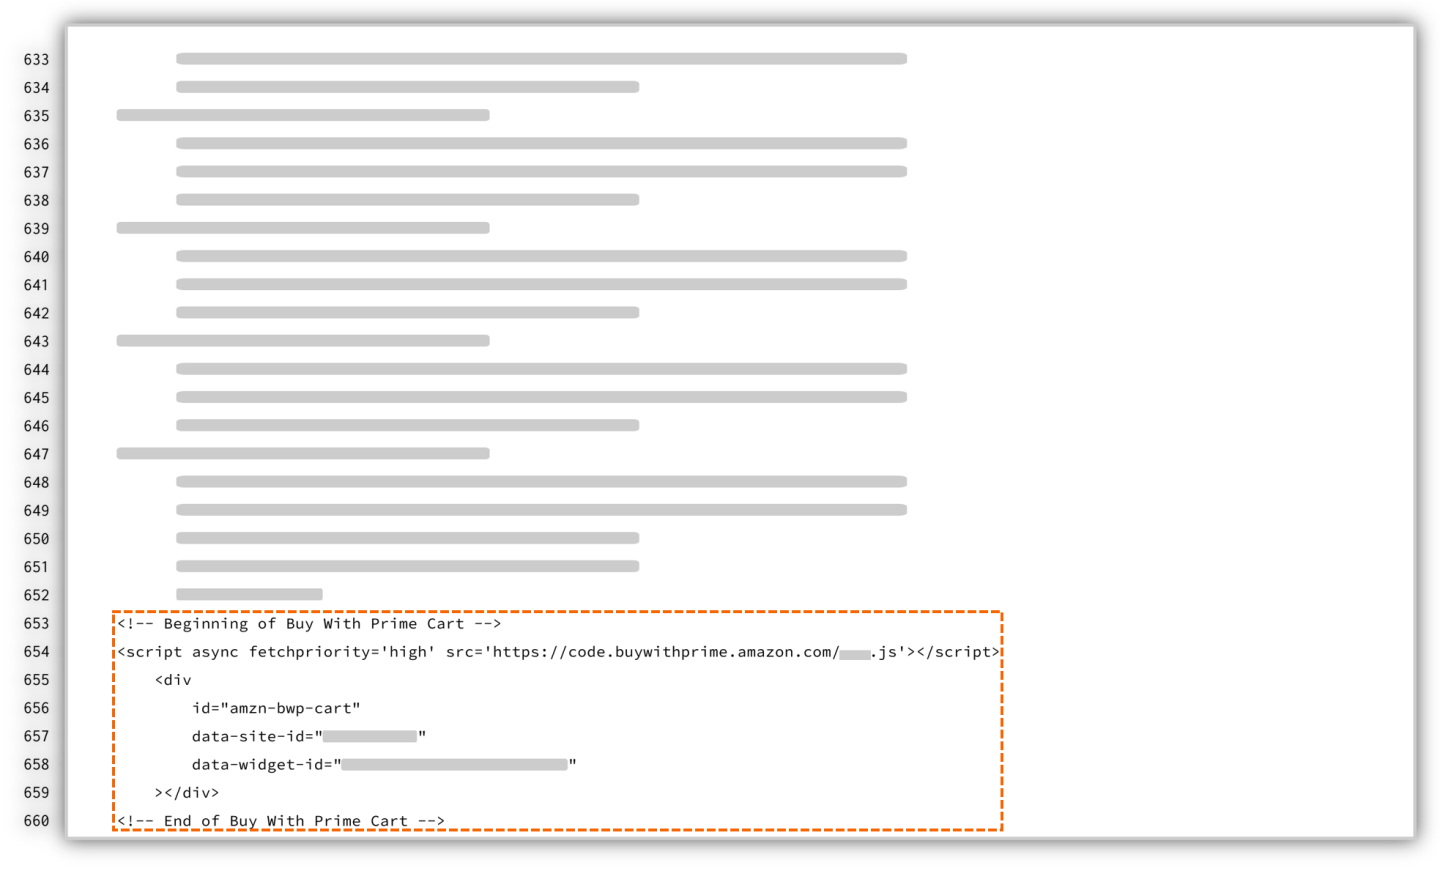
Note: Depending on your theme, your path might differ. - Paste the Buy with Prime cart code before the closing </body> tag as shown in the following example:
Note: The merchant console generates a code that has all your site details. You don’t need to change anything in the code. - Choose Save File.
- Use Preview mode on your site to review the cart placement, and then choose Save.
- If you’re editing a copy, choose Use as Active Theme, and then Publish.
Important: If you use the Order connector app by Alloy, you need to upgrade to the latest version to correctly sync Buy with Prime orders with multiple items to your ecommerce site.
Note: If the Buy with Prime cart doesn’t appear when you choose the Buy with Prime button, clear your cache and cookies, and then refresh the page. If you’re still having issues, go to Troubleshooting Buy with Prime cart or contact merchant support.
Add Buy with Prime cart to Shopify sites
To add the Buy with Prime cart to your Shopify site, perform the following steps:
- On your Shopify admin, choose Online store, and then Themes.
- Create a duplicate of the theme file as a backup.
- Choose the more actions (…) drop-down menu on your theme, and then Edit Code.
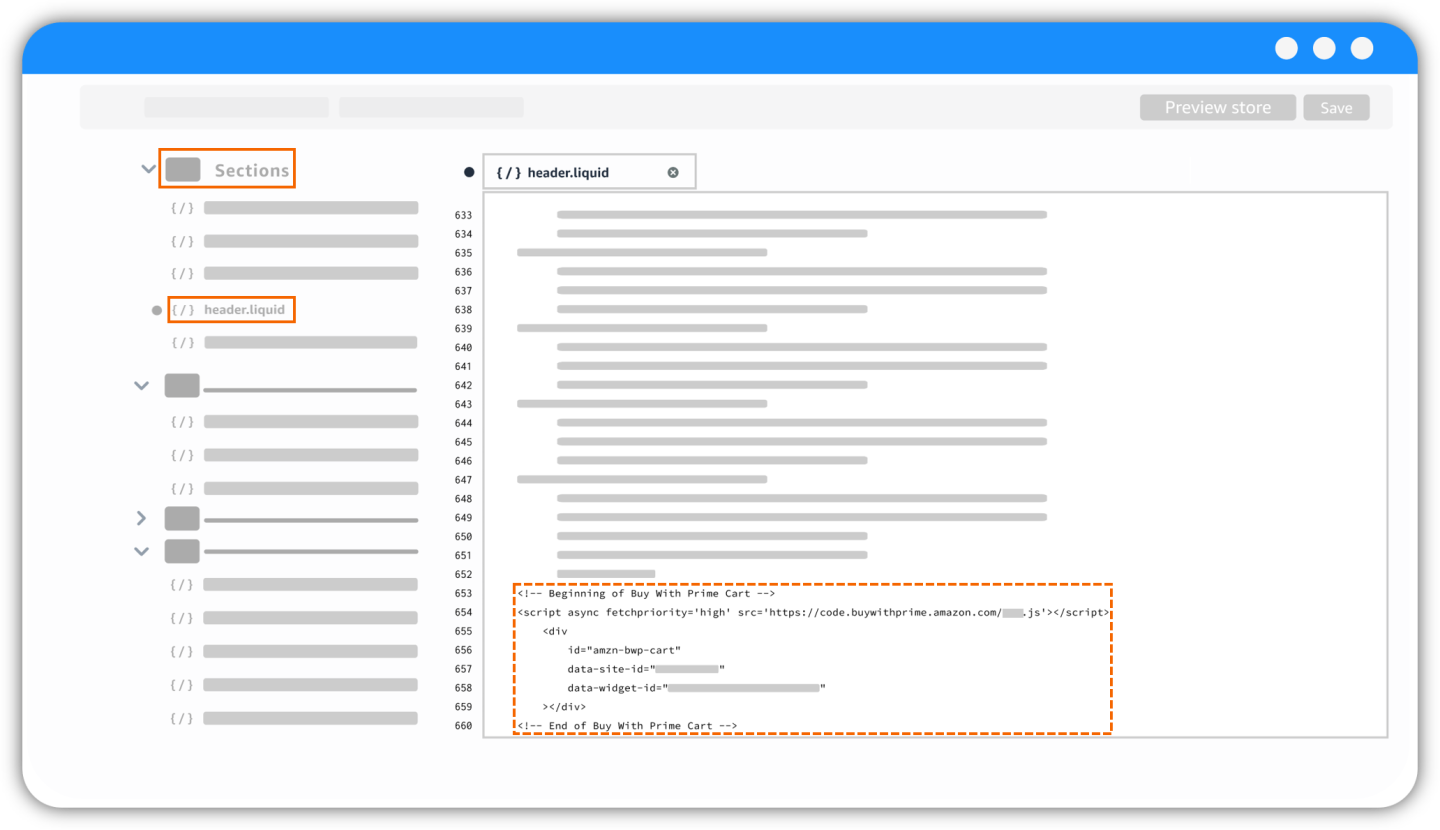
- In the code editor, choose Sections, and then you can choose ONE of the following files:
header.liquid
OR
footer.liquid
OR
theme.liquid - Paste the Buy with Prime cart code that you copied earlier in the process to the file that you chose to edit:
- If you chose header.liquid: Paste the code as the last line of code as shown in the following example:
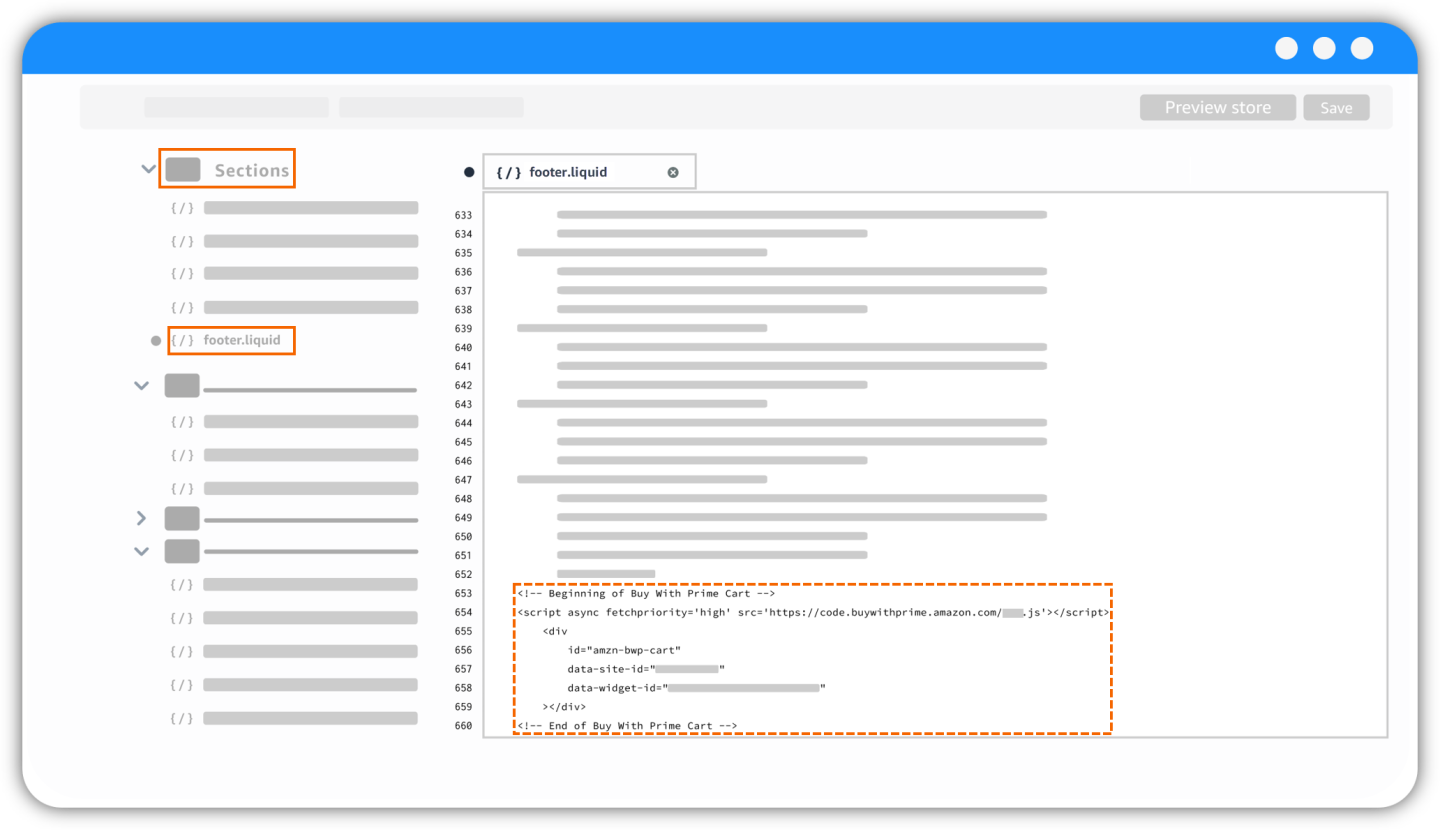
- If you chose footer.liquid: Paste the code as the last line of code as shown in the following example:
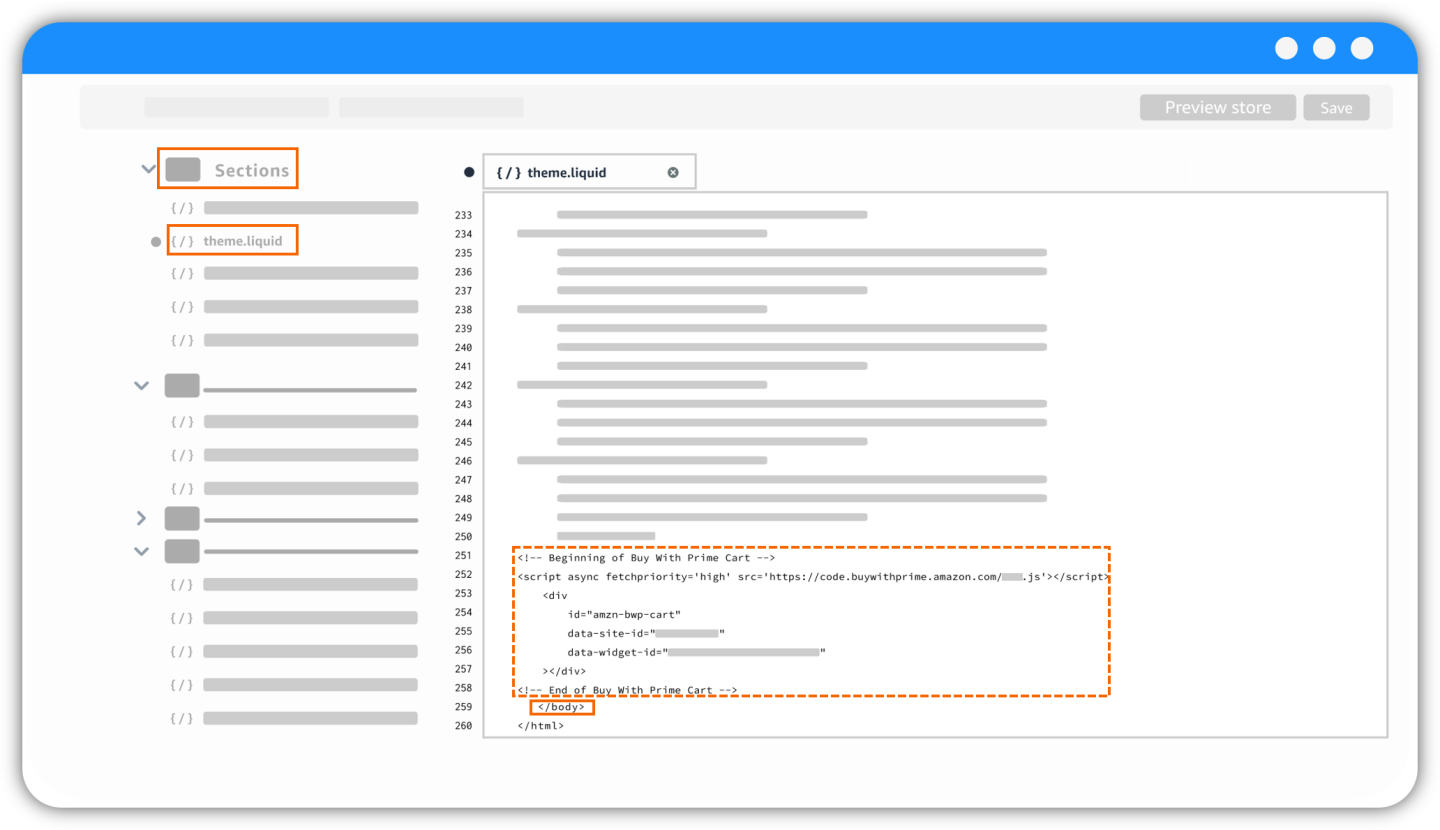
- If you chose theme.liquid: Paste the code before the closing </body> tag as shown in the following example:
Note: The merchant console generates a code that has all your site details. You don’t need to change anything in the code.
- If you chose header.liquid: Paste the code as the last line of code as shown in the following example:
- Choose Save.
- To review the Buy with Prime cart placement on your site, choose Preview store.
Important: If you use the Order connector app by Alloy, you need to upgrade to the latest version to correctly sync Buy with Prime orders with multiple items to your ecommerce site.
Note: If the Buy with Prime cart doesn’t appear when you choose the Buy with Prime button, paste the cart code in one of the other two files. If you’re still having issues, clear your cache and cookies, and then refresh the page. If the button doesn’t appear on your product page, go to Troubleshooting Buy with Prime cart or contact merchant support.
Add Buy with Prime cart to WooCommerce sites
WooCommerce site not hosted on WordPress
If your store isn’t hosted on WordPress, use the following instructions to install the Buy with Prime cart code:
- Open your cPanel dashboard.
- Install the WPCode Lite Plugin, also known as WPCode. This plugin helps to insert headers, footers, and code. If you already have the WPCode Lite Plugin installed, skip to Step 6. If you don’t have the WPCode Lite Plugin, go to Step 3.
- On the Plugins section, choose Add New.
- In the Search Plugins field, enter “WPCode Lite”, and then choose Search.
- Install the Plugin, and then choose Active. A new option called Code Snippets appears on your dashboard side menu.
- On the side menu, choose Code Snippets, then Code Snippets, and then Add New.
- Choose Create Custom Snippet.
- In the Add title for snippet field, enter “BwP Cart”.
- For Code Type, select HTML Snippet.
- In the Code Preview editor, paste the Buy with Prime cart code.
Note: The merchant console generates a code that has all your site details. You don’t need to change anything in the code. - Choose Save Snippet.
- Activate the snippet, and then choose Update.
- Preview the Buy with Prime cart placement on your site.
Important: If you use the Order connector app by Alloy, you need to upgrade to the latest version to correctly sync Buy with Prime orders with multiple items to your ecommerce site.
Note: If the Buy with Prime cart doesn’t appear when you choose the Buy with Prime button, clear your cache and cookies, and then refresh the page. If you’re still having issues, go to Troubleshooting Buy with Prime cart or contact merchant support.
WooCommerce site hosted on WordPress
If your store is hosted on WordPress, use the following instructions to install the Buy with Prime cart code:
- On your WordPress admin portal, choose Appearance, and then Theme File Editor.
- On the side file hierarchy, locate the WooCommerce template-functions.php file. For example, choose inc, WooCommerce, and then THEME-WooCommerce-template-functions.php.
Note: Depending on your theme, your path might be different. - Paste the Buy with Prime cart code as the last line of code as shown in the following example:
Note: The merchant console generates a code that has all your site details. You don’t need to change anything in the code. - Save your changes, and then preview the Buy with Prime cart placement on your site.
Important: If you use the Order connector app by Alloy, you need to upgrade to the latest version to correctly sync Buy with Prime orders with multiple items to your ecommerce site.
Note: If the Buy with Prime cart doesn’t appear when you choose the Buy with Prime button, clear your cache and cookies, and then refresh the page. If you’re still having issues, go to Troubleshooting Buy with Prime cart or contact merchant support.
Add Buy with Prime cart to other ecommerce providers or custom sites
To add Buy with Prime cart to other ecommerce providers or a custom-built site, follow these steps:
- Locate a template file that affects all pages on your site such as the header or the footer.
- Paste the Buy with Prime cart code within the template file.
Note: The merchant console generates a code that has all your site details. You don’t need to change anything in the code. - Preview your changes, and then publish your site.
Note: If the Buy with Prime cart doesn’t appear when you choose the Buy with Prime button, clear your cache and cookies, and then refresh the page. If you’re still having issues, go to Troubleshooting Buy with Prime cart or contact merchant support.
Customize the Buy with Prime cart placement
You can customize the placement of the Buy with Prime cart icon on your site at any time without the need to reinstall your code.
Note: When customizing the cart placement on your site, ensure that the user experience (UX) elements don’t conflict with each other.
- Sign in to the merchant console.
- On the side menu choose Settings, and then Button & cart.
- Go to the Customize your button & cart section, and then choose Customize. You’re directed to a new page where you can customize the placement of your Buy with Prime cart.
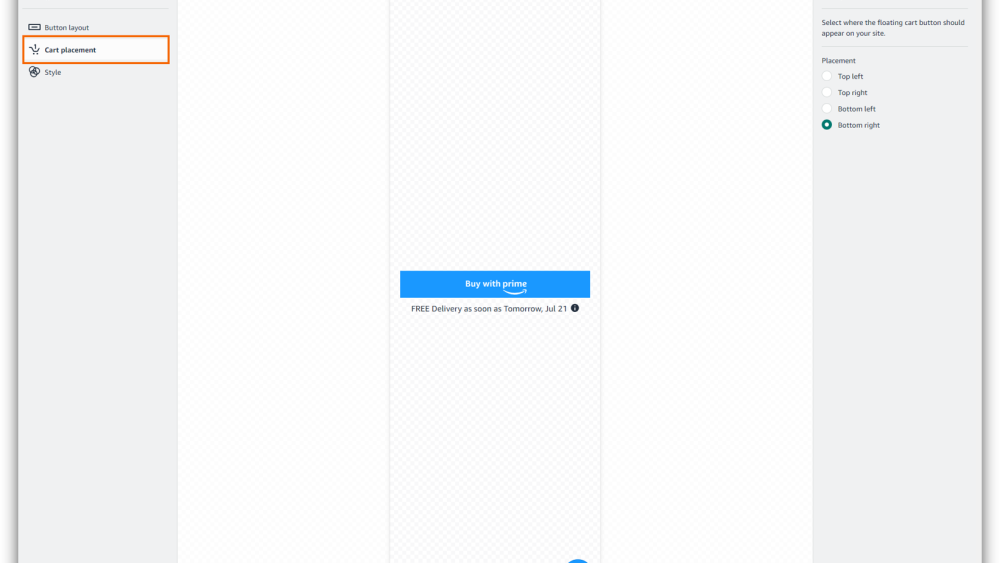
- Choose Cart placement, and then select where you want the cart to appear on your product page. The default Buy with Prime cart placement is on the bottom right of the page.
- Choose Save.
- Choose the exit icon to go back to the merchant console home page.
Troubleshoot Buy with Prime cart
Use the following troubleshooting information to identify and address some issues that can occur while setting up and installing Buy with Prime cart.
| Issue | Cause | Solution |
| The Buy with Prime cart isn’t visible on all pages on my site. | The Buy with Prime code was added to a file that doesn’t update all your site pages. | Find a template file that affects all pages on your site, and paste the Buy with Prime cart code there. |
| The Buy with Prime cart overlaps with other elements on my page. | The current Buy with Prime cart placement might not be the correct one for your site. | Change the placement of your Buy with Prime cart by following the steps listed in Customize Buy with Prime cart placement. |
| An error appears when turning on Buy with Prime cart. | Only the account owner or admin can activate Buy with Prime cart. This error occurs when a user without owner or admin permissions attempts to turn on Buy with Prime cart. | Contact the admin/owner to turn on/off Buy with Prime cart. If you need to check the user associated with the admin/owner role, perform the following steps: 1. Sign in to merchant console. |
Buy with Prime cart FAQ
Get answers to common questions about the Buy with Prime cart.
For other questions, go to FAQ library.

