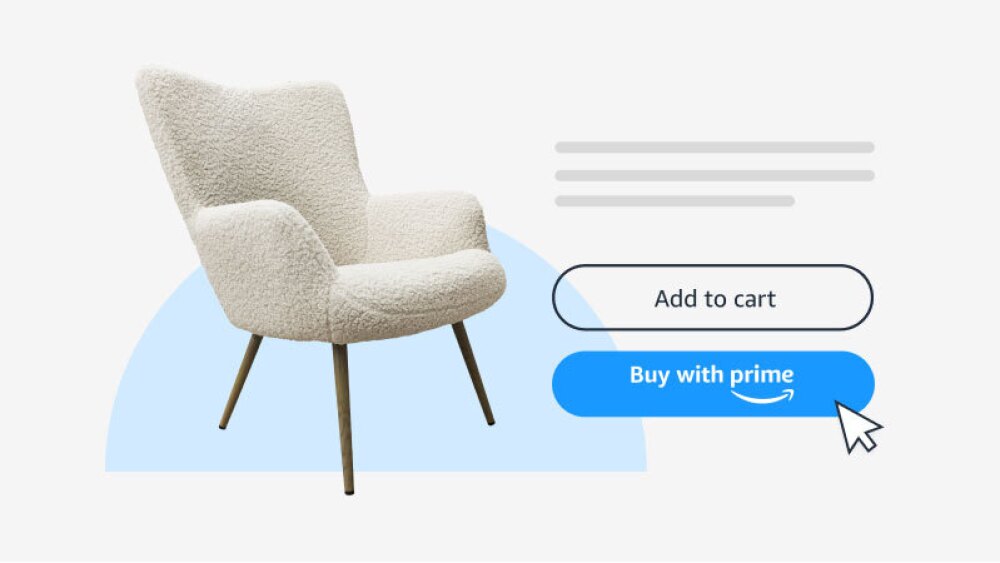
With the Buy with Prime app for BigCommerce, you can grow your ecommerce businesses by attracting shoppers to your site with the trust of Prime, and then converting them with fast, free shipping and a checkout experience millions of shoppers know and trust. You can add Buy with Prime to your BigCommerce site and manage both your ecommerce site and Buy with Prime product catalogs in one place.
-
Starting from BigCommerce
-
To set up Buy with Prime starting from BigCommerce, you need to complete a combination of steps using the merchant console and your BigCommerce control panel.
Initial Buy with Prime button set up
BigCommerce control panel steps.
- Install the Buy with Prime app for BigCommerce: Select the Buy with Prime app for BigCommerce and authorize Buy with Prime to access your data.
- Select storefront(s): Select the storefronts where you want to activate Buy with Prime.
- Connect your Buy with Prime account: Link your Buy with Prime account and BigCommerce.
Note: If you don't have a Buy with Prime account, proceed with the following steps in the merchant console:
- Select your ESP: Select BigCommerce.
- Complete prerequisites for Buy with Prime: Link to Seller Central, activate Amazon's fulfillment services, and register for Amazon Pay.
- Create your Buy with Prime button: Enter your site and URL details, indicate if you offer product variations and upload your business logo.
- Customize your Buy with Prime button: Select the Buy with Prime button type, color, and style that you want.
Note: If you already have a Buy with Prime account, proceed with the following steps in the BigCommerce control panel:
- Connect your Seller Central or Multi-Channel Fulfillment account: Link your Seller Central or Multi-Channel Fulfillment and BigCommerce accounts.
- Link products: Map your Buy with Prime and BigCommerce SKUs. The app will automatically perform SKUs linking adding a label to each product: Exact match, Close match and No match.
- Enable Buy with Prime eligibility: Select the products that you want to activate Buy with Prime.
- Deploy button: Drag and drop the Buy with Prime button on your site PDP template.
Continuous maintenance after initial Buy with Prime set up
BigCommerce control panel steps.
- Manage your products: Continue to activate Buy with Prime on more products by mapping and selecting SKUs.
- Disconnect Buy with Prime: Deactivate Buy with Prime from your storefront(s).
- Additional Buy with Prime features: Set up promotions, tax configuration, customize your Buy with Prime button, order returns and cancellations. Note: These additional features can be found through the BigCommerce control panel or the Buy with Prime merchant console.
FAQ
For questions related to the Buy with Prime app for BigCommerce, go to FAQ for Buy with Prime app for BigCommerce.
For general questions about Buy with Prime, go to FAQ Buy with Prime general.
-
Install the Buy with Prime app for BigCommerce
To install the Buy with Prime app for BigCommerce, follow these steps:
Step 1Log in to the BigCommerce store, choose and account and associated store, and then choose Continue.
Step 2From the side menu, go to Apps, then Marketplace.
Step 3Search for the Buy with Prime app, and choose Get this app.
Step 4Log in with your existing BigCommerce store, and choose Install.
Step 5Choose Confirm to authorize Buy with Prime to access your BigCommerce store.
-
Select storefront
There are two types of storefronts:
- BigCommerce stencil theme storefront: This type of storefront incorporates industry best practices in technology, design standards, and SEO.
- Headless storefront: This type of storefront allows you to connect to any frontend network, letting you build your own storefront.
Note: Headless storefronts require manual deployment of the Buy with Prime button on your site product detail page template.
To manually set up the button on a headless storefront, go to Add Buy with Prime to your BigCommerce site.
Select the storefront(s) where you want to activate Buy with Prime and then choose Continue.
-
Connect your Buy with Prime account
Note: You need to create a Buy with Prime account before this step. If you don't have a Buy with Prime account, go to Sign up and user settings.
To connect your Buy with Prime account to BigCommerce, follow these steps:
Step 1If you already have a business, choose Get started. If you don’t have an account, choose Sign up, and follow the steps to create an account as listed in Sign up and user settings.
Step 2Choose Authorize to authorize BigCommerce to access your Buy with Prime data. This process can take up to one minute.
Step 3After your BigCommerce account has been successfully connected to Buy with Prime, choose Continue.
If the connection is unsuccessful, contact merchant support.
Note: If you don't have a Buy with Prime account, proceed with the following steps in the merchant console:
- Select your ESP: Select BigCommerce.
- Set up prerequisites: Link to Seller Central, activate Amazon's fulfillment services, and register for Amazon Pay.
- Create your Buy with Prime button: Enter your site and URL details, indicate if you offer product variations and upload your business logo.
- Customize your Buy with Prime button (optional): Select the Buy with Prime button type, color, and style that you want.
-
Select your ESP
You can set up Buy with Prime on a major ecommerce site provider (ESP) or your own custom built site.
To select the use of the Buy with Prime app for BigCommerce, follow these steps:
Step 1On the setup page, choose BigCommerce as your ESP, and then choose Get started.
Step 2Choose Get started.
-
Complete prerequisites for Buy with Prime
To offer Buy with Prime on your site, you need:
- A Professional Seller Central account to import your existing Amazon product catalog information to your Buy with Prime catalog.
- Amazon's fulfillment services, which includes Multi-Channel Fulfillment (MCF) to offer a fast, free delivery experience for Buy with Prime orders.
- Amazon Pay to offer shoppers a fast, familiar way to check out using the shipping and payment information from their Amazon account. For more information on setting up Amazon Pay, go to Payments.
When Buy with Prime is activated on your site, US-based shoppers can see the Prime badge on your site product detail pages for the products that you've selected to offer Buy with Prime, along with real-time delivery promises throughout checkout. Using the Buy with Prime button, shoppers can check out directly for single product purchases by signing into Amazon to use their payment and shipping information and get timely delivery notifications and free 30-day returns on eligible orders.
To learn more about Buy with Prime pricing, go to Pricing.
-
Create your Buy with Prime button
To generate the Buy with Prime button for your BigCommerce site, go to the Buy with Prime section on merchant console and complete these steps:
- On the Create Buy with Prime button page, add your site details:
- Select your ecommerce service provider from the dropdown.
- Enter your store name: This name appears when shoppers sign in and check out using Buy with Prime.
- Enter your privacy policy URL: This policy shows up in your footer and sets expectations with customers on how you might use their data. If you don’t have this policy, contact your provider.
- Enter your terms and conditions URL: These terms and conditions (T&C) show up in your footer and provide terms your customers agree to when completing a transaction. If you don’t have T&C, contact your ESP.
- Under Your URL, enter your site URL with and without the "www" (such as, "example.com"), and then choose Add URL. You can list multiple URLs related to your site to activate the Buy with Prime button. The URLs can include product detail pages.
- Variations: Product variations are the options of a main product with different attributes, such as different scents, colors, sizes, pricing, materials, or any other specific features. Choose yes or no if you have single products with multiple SKU variations.
- Business logo (Optional): Upload a logo to create a branded checkout and order confirmation experience for your shoppers. Choose Upload logo and select a .jpg, .png, or .gif image of up to 15MB.
Note: To solve issues with your logo format, size, or quality, go to Troubleshoot the Buy with Prime business logo - Customize your button (Optional): Customize your button type, color, and style.
- After completing your site details, URL, and variations, choose Create button to generate a button for your site.
- On the Create Buy with Prime button page, add your site details:
-
Customize your Buy with Prime button
Customize the appearance of the Buy with Prime button. Choose Customize button to be directed to a new page where you can customize how your Buy with Prime button appears on your ecommerce site. You can customize the following elements at any time:
- Options: Select the button only or the full component.
- Style: Select your button color scheme and button corner type.
The button preview on the middle of the page shows you how each option will appear on your site. For more information and best practice, go to To customize your Buy with Prime button.
Note: If you already have a Buy with Prime account, sign in and follow these steps in the BigCommerce control panel:
- Connect Seller Central or Multi-Channel Fulfillment: Link your Seller Central or Multi-Channel Fulfillment and BigCommerce accounts.
- Link products: Map your Buy with Prime and BigCommerce SKUs. The app will automatically perform SKUs linking adding a label to each product: Exact match, Close match and No match.
- Pick which products to offer Buy with Prime: Select the products that you want to activate Buy with Prime.
- Deploy button: Drag and drop the Buy with Prime button on your site PDP template.
-
To connect your Seller Central or Multi-Channel Fulfillment account to BigCommerce, follow these steps:
Step 1Choose Get started to be directed to Seller Central.
Step 2Authorize Amazon to provide BigCommerce Buy with Prime access to your Selling Partner account and related data, and then choose Confirm.
Step 3After your BigCommerce account has been successfully connected to Seller Central, choose Continue.
If the connection is unsuccessful, contact merchant support.
Note: If you don't have a Seller Central or Multi-Channel Fulfillment account, go to Complete prerequisites for Buy with Prime.
You can only connect one Seller Central or Multi-Channel Fulfillment account to Buy with Prime during setup.
You can add more accounts later.
-
Link products
The Buy with Prime app for BigCommerce maps your Amazon products to their corresponding BigCommerce products, based on the product title, description, and price. To complete linking your products, follow these steps:
Step 1On the Buy with Prime app for BigCommerce, choose Start linking and wait for products to be mapped.
Step 2Review the mapping of Amazon products to BigCommerce products.
To indicate the status of the mapping, the Buy with Prime app for BigCommerce adds a label to each product in the following tabs:
- Ready to link
- Close match
- No match
Step 3If you have products in the Close match tab or in the No match tab, choose Edit match to update the mapping to a different product, then choose Select.
Note: Setting up Buy with Prime requires linked products. You must link at least one storefront product to activate the Buy with Prime button.
Step 4Choose Link to complete the SKU linking.
Step 5Choose Continue to select which products offer Buy with Prime.
-
Enable Buy with Prime eligibility
When first adding Buy with Prime to your site, it's best practice to prioritize your best-selling products to offer your customers the Prime checkout experience that they know and trust.
To activate the Buy with Prime button for your products, follow these steps:
Step 1On the Buy with Prime app for BigCommerce, go to Enable Buy with Prime eligibility.
Step 2Find the product that you want to offer Buy with Prime. Make sure that the product is both fulfilled by Amazon and has inventory in an Amazon fulfillment center.
Note: To validate your inventory levels, go to Check product inventory in Seller Central.
Step 3Select Prime enabled for each product, or choose Activate All.
Step 4When you've finished selecting your products for Buy with Prime, choose Continue.
Note: By default, shoppers who aren't Prime members are offered the option to sign up for Prime or resume a paused Prime membership during Buy with Prime checkout. To deactivate this default option, go to the Buy with Prime merchant console, Amazon services tab, and then Prime membership prompt. Choose Actions, and then choose Deactivate Prime membership prompt. The status changes to Inactive.
-
Deploy the Buy with Prime button
You can deploy the Buy with Prime button to the following types of storefronts:
- BigCommerce stencil storefronts
- Headless storefronts
To place the Buy with Prime button on your site, follow these steps:
Step 1Choose Preview Button to be directed to your product detail page template.
Step 2Drag the button to your preferred location on the page.
Step 3Choose Save then Close to return to the Buy with Prime app in Channel Manager.
Note: The button looks different while you drag and drop it, but it resolves to the original look after you deploy it. This doesn’t affect your customization.
Step 4If you have multiple storefronts, choose Next storefront to place the Buy with Prime button on each of your storefronts.
Step 5When all your storefronts have the Buy with Prime button, choose Finish.
Note: The Buy with Prime badge only appears when you have inventory with Amazon. Make sure to keep an eye on your Amazon inventory directly in the BigCommerce control panel. We recommend that you set a weekly or bi-weekly reminder to check on your inventory, so you always have enough inventory to fulfill Buy with Prime orders on your site.
Step 6Navigate to your store and view the button live on eligible products. If the button doesn’t appear, contact merchant support.
Continuous maintenance after initial Buy with Prime set up
BigCommerce control panel steps.
- Manage your products: Continue to activate Buy with Prime on more products by mapping and selecting SKUs.
- Disconnect Buy with Prime from my BigCommerce site: Deactivate Buy with Prime from your storefront(s).
- Additional Buy with Prime features: Set up promotions, tax, order returns and cancellations. Note: These additional features can be found through the BigCommerce control panel or the Buy with Prime merchant console.
-
Manage your products
After your initial Buy with Prime set up using the Buy with Prime app for BigCommerce, you can adjust your SKU mapping and product selection at any time.
- To adjust your BigCommerce and Buy with Prime SKU mapping, go to Link products.
- To change your selection of products for Buy with Prime, go to Enable Buy with Prime eligibility.
-
Disconnect Buy with Prime
To disconnect the Buy with Prime app from your BigCommerce storefront, follow these steps:
Step 1On the BigCommerce merchant control panel side menu, choose Select channel, and then select Buy with Prime app.
Step 2Choose Settings, and then choose Disconnect to deactivate the Buy with Prime app from your BigCommerce site.
Note: The preceding steps deactivate Buy with Prime from the BigCommerce stencil and headless storefronts that you linked during initial setup.
-
Additional Buy with Prime features
View the activities page on the BigCommerce control panel channel manager to find additional links for actions on the merchant console, including the following actions:
- Tax configuration.
- Customize your Buy with Prime button.
- Set up promotions.
- Order returns and cancellations.
View order and return data
With the Buy with Prime app for BigCommerce, you can view your Buy with Prime orders. Your orders are automatically synced back to BigCommerce. You can see your Buy with Prime orders in two locations:
BigCommerce control panel:
- On the BigCommerce control panel, choose Home, and then Orders.
- Choose View, then All Orders.
Buy with Prime merchant console:
- On the BigCommerce control panel, choose Home, and then Channel Manager.
- From Marketplaces, choose Buy with Prime.
- From the side menu, choose Orders, then Open Amazon Merchant console.
Tax configuration
To charge taxes for any items you’re selling, go to the merchant console and follow these steps:
Step 1Choose Apply taxes to charge taxes at checkout.
Step 2Edit your tax region and add locations to apply taxes to your orders.
Step 3Complete the tax settings and categories that apply to your business.
-
Check product inventory in Seller Central
Step 1Open Seller Central.
Step 2Choose inventory.
Step 3Choose Manage all inventory.
Step 4Search your product by SKU, then press Enter.
Step 5The status of your product should be Active. Products with no inventory have an Inactive status. Check for any notes related to other reasons for Inactive status.
Step 6Check the Available column for inventory count. It should be more than zero to offer Buy with Prime.
Learn more about how to manage your Amazon inventory.
-
FAQ for Buy with Prime app for BigCommerce
-
FAQ based on ESP